Cloud Print Setup Guide (Easy Steps)
Follow these steps to set up Cloud Printing with Odoo:
Step 1: Get Your License Key
- Purchase the Cloud Print service here
- After purchase, you will receive a License Key via mail with subject 'Your Cloud Printing License'.
Step 2: Download the Print Agent
- Check your email with the subject “Your Cloud Printing License” and use the link provided in 'How to Get Started' section to download the Cloud Print Agent.

- You may also download agent by Navigation to My Account -> Printing Licenses.

- Save it on the computer that is connected to your printer
- Extract the downloaded file (OdooPrintAgent.zip)
Step 3: Run the Print Agent
- Start the agent by clicking OdooPrintAgent Application (OdooPrintAgent.exe) as shown below on the same computer where your printer is connected

- Agent is preconfigured if you get the below message.
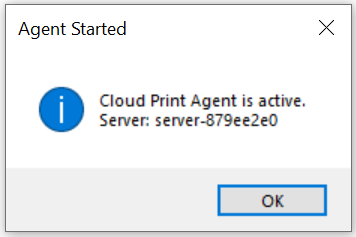
- Keep this agent running in the background
- If above message is not displayed, perform steps in Step 4 to configure the Agent manually (Skip if agent is preconfigured)
Step 4: Configure the Agent manually (Optional)
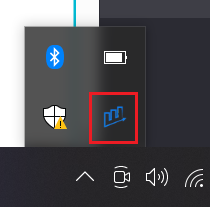
- Locate the CloudPrint agent
- Right click on icon and select Edit Config option
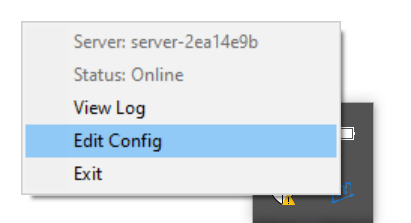
- Update the following details in agent.ini file and Save:
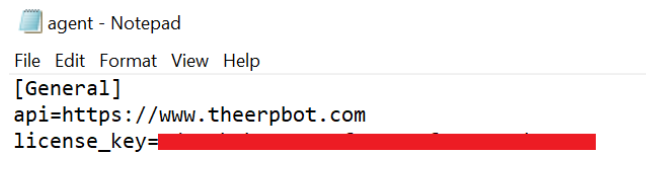
API URL = https://www.theerpbot.com
License Key = your-license-key
(Replace with your actual license key from the mail)
4. Restart the Agent again.
Step 5: Install Cloud Print App in Odoo
- Go to Odoo App Store and purchase and install the Cloud Print app by clicking below link
Buy Cloud Print
Step 6: Open Cloud Print App in Odoo
1. Search for CloudPrint App in Odoo

Step 7: Enter Configuration Details
1. Click on New Button to create entry for license key
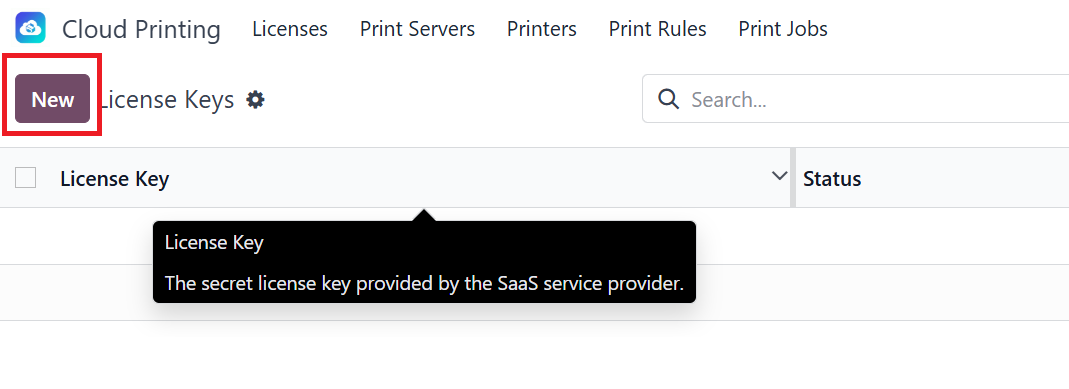
2. Paste the License key, a new entry will be created

3. Select the particular License key and Click on Sync Printer buton

4. Printer will be synced and status will change to Online.

Step 8: Odoo automatically creates server
- Odoo will automatically:
- Detect available printers
- Create print servers

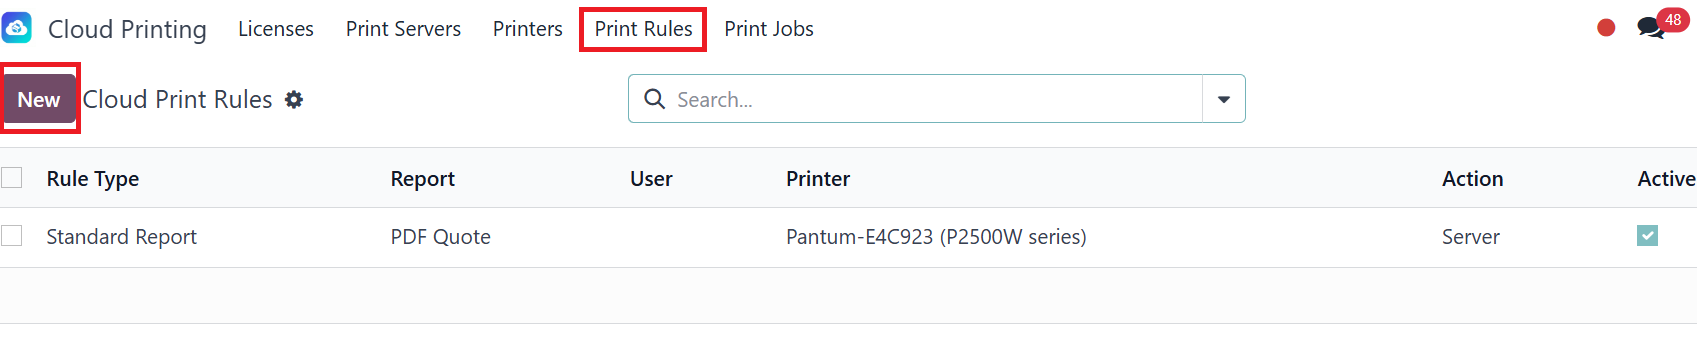
Step 9: Define Print Rules
- Go to Print rules to define rules and click on New Button
- Fill in the required details as follows:
a. Select Rule Type: Choose either Standard Report or Shipping Label
Standard Report
This is for Odoo Documents (PDFs).
Definition: A rule that targets any system-defined report (e.g., Invoices, Sales Quotations, Purchase Orders).
Trigger: This rule activates as soon as Odoo's standard PDF engine finishes generating the report.
Setup: You must select a specific system report and a target printer.Shipping Label
This is for External Logistics Documents (ZPL/EPL/PDF).
Definition: A rule that targets raw label data returned from a shipping carrier's API (e.g., UPS, FedEx, BlueDart).
Trigger: This rule activates specifically during the "Validate" step of a Delivery Order (Picking) once the carrier returns the tracking number and label file.
Setup: Instead of choosing a report, you select a Delivery Method (e.g., UPS Ground) and a target Label Printer.
b. Select Report: Pick the report you want to configure
c. Select Printer: Choose the connected printer
d. Select User: Specify the user for whom printing should work, or leave it blank to apply for all users
e. Select Action: Choose Server or Client
Server: Select this if the print should be sent directly to the printer
Client: Select this if the print should not be sent to the printer for the time being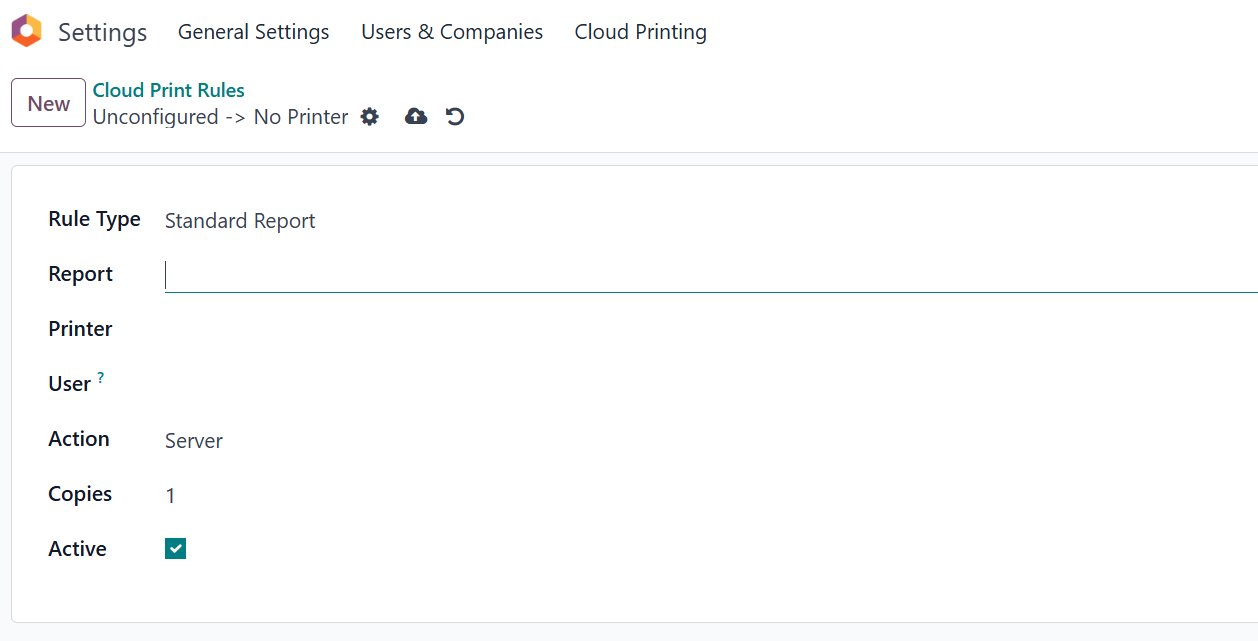
3. Click Save.
Step 10: Done
- Your printers are now connected to Odoo Cloud Print
-
You can start printing directly from Odoo
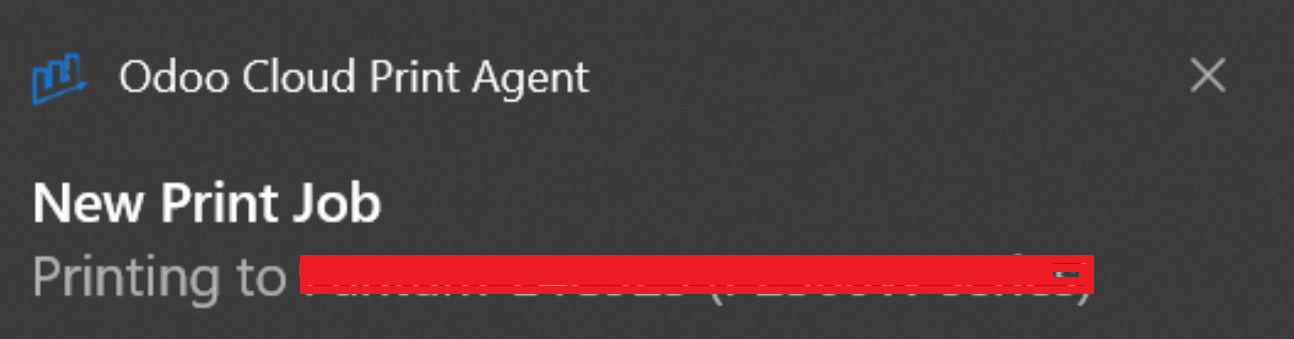
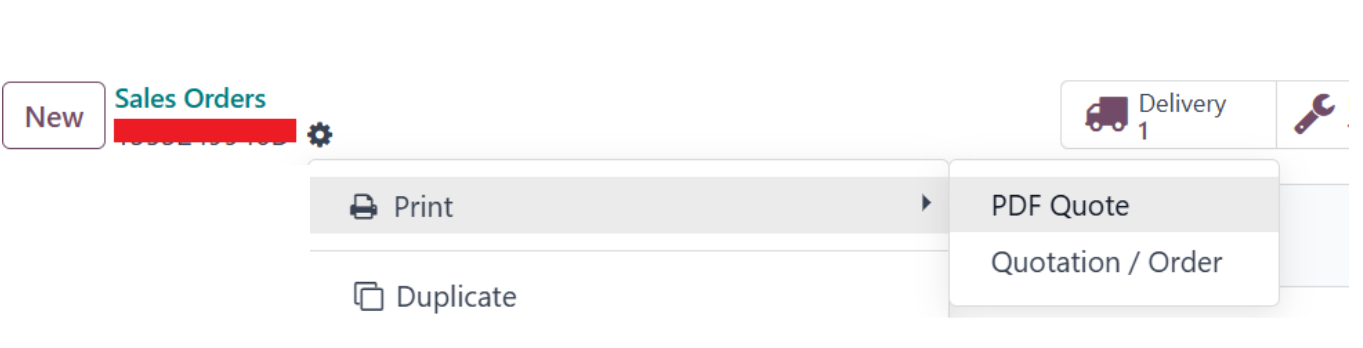
Example:
- When we print the document, it will be sent to Printer Automatically
- Below message will be displayed